
How to lay 3D concrete wall tile on site
Cast relief tile is heavy, dimensional and unforgiving of a bad substrate. Substrate, setting out, adhesive, corners and lighting, from walls we have laid.
- 3d wall tile
- installation
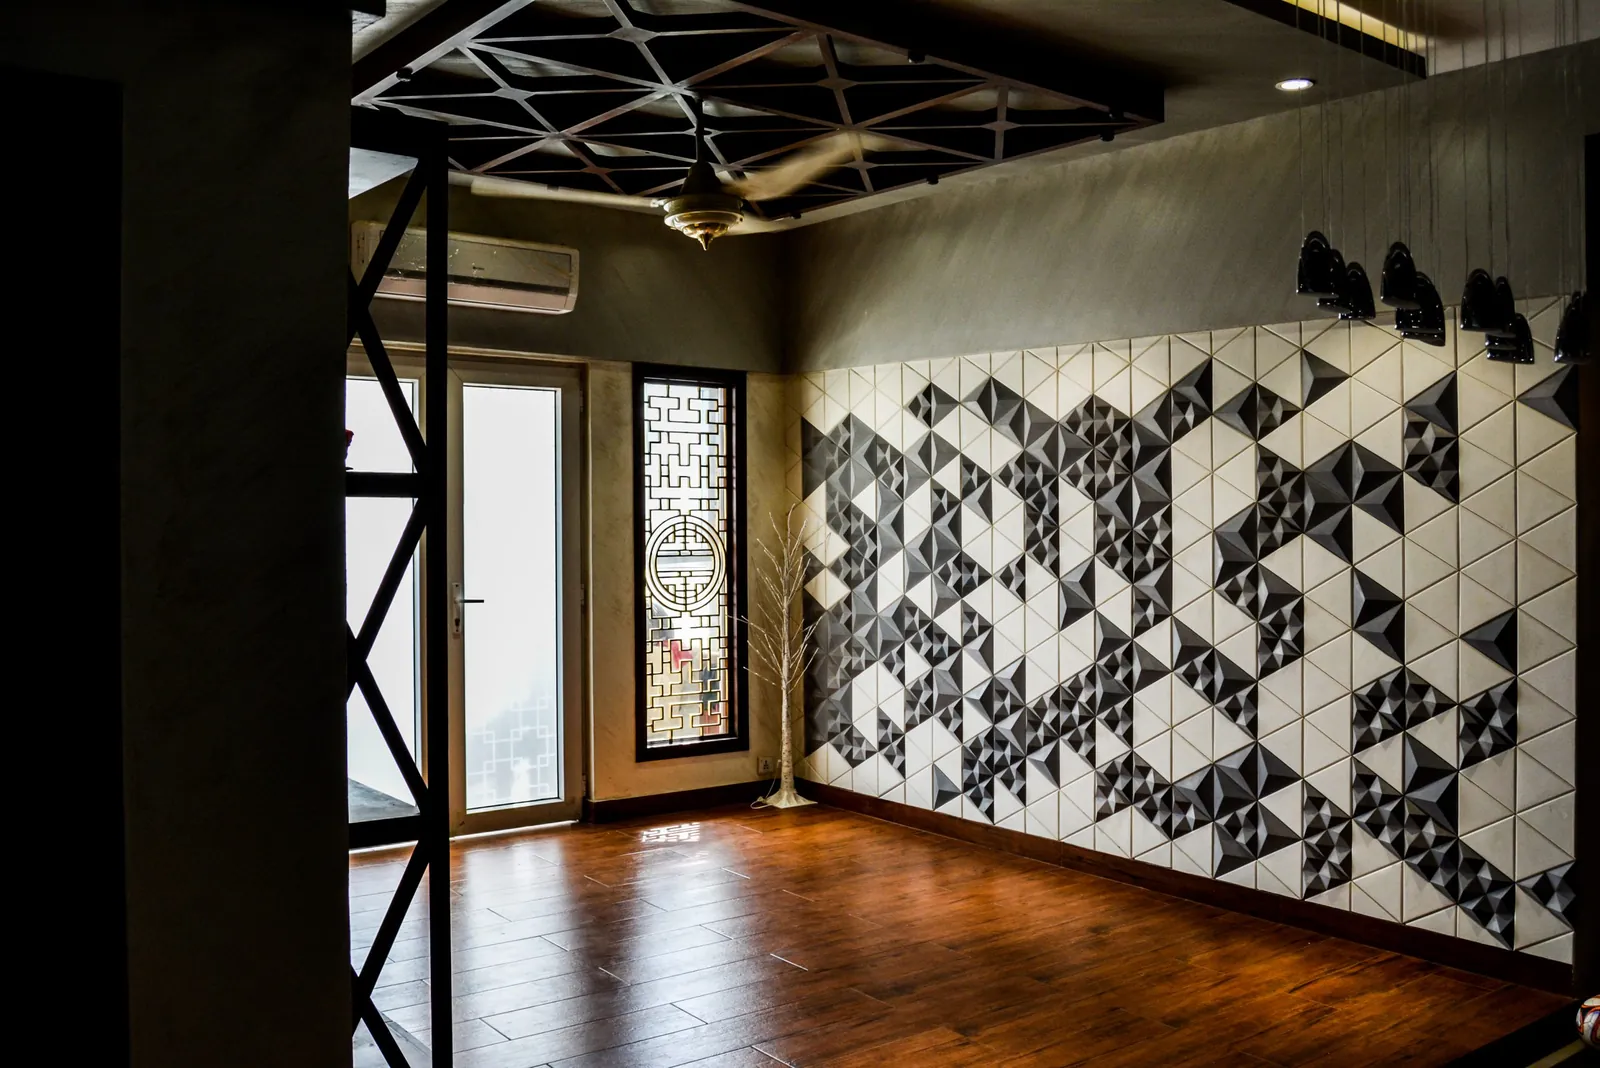
A 3D concrete wall tile is a cast relief unit. It is heavier than a ceramic tile of the same face size, its face is deliberately not flat, and once laid it reads as one sculpted plane rather than a grid of pieces. That last property is what makes it worth using and what makes a sloppy installation obvious from across the room.
We run six patterns: Shakl, Mathlath, Khewra, Lehr, Arrow and Koella.
Before the first tile
The substrate
Relief tile does not hide a bad wall. It amplifies it, because light raking across the face turns a two millimetre bow into a visible ripple along a shadow line.
- The wall has to be flat, plumb and dry. Check it with a long straightedge in both directions.
- Fix any bow before tiling. Dubbing out under the bed is not a substitute for a flat wall on a relief installation.
- Let new plaster and render cure and dry. A tile bonded to a shrinking substrate ends up carrying the movement.
- On plasterboard or a light framed wall, check the loading first. Cast concrete is heavy per square metre and the wall build has to be designed for it.
Setting out
Set out the whole elevation on paper, at real dimensions, before a single tile is opened. Three decisions are made here. Where the field starts, so the cut tiles land where nobody looks rather than beside the entrance door. Whether the pattern runs to a centre line, which most geometric patterns want. And what happens at the top, where a half height course under a ceiling is far more visible than one at a skirting.
Lehr and Koella carry a strong directional geometry, so a pattern that drifts half a tile over a long wall shows immediately. Dry lay the first two courses on the floor, against the drawing, before fixing anything.
Mix from several boxes as you go. These are cast units in a pigmented cement, so there is variation between production runs, and emptying one box at a time concentrates it into a visible block on the wall.
Adhesive and fixing
Use a cement based adhesive rated for heavy tile. A general purpose thin set is a false economy here. Most specifiers write a C2 class adhesive under EN 12004 with slip resistance and extended open time, which is a reasonable default.
Solid bed, always. Notch the wall, back butter the tile, and flatten the ridges so the bed is continuous. Voids behind a relief tile are where a corner eventually breaks off, because the face is not a flat plate and loads do not spread the way they do in a ceramic tile.
Work from the bottom up, with support under the first course until the adhesive has taken. Heavy tile creeps down a green bed, and a course that has crept has to come off.
On a high wall, an external elevation, or anything above head height in a public area, mechanical fixing belongs in the specification alongside the adhesive. That is a question for the project engineer.
Corners and returns
Corners are where a relief tile installation is judged.
External corners. A mitre is the honest detail. Cut both tiles at 45 degrees through the body so the relief continues around the corner without a butt joint showing an unfinished edge. On a pattern with a strong diagonal such as Mathlath, work out which face carries around the corner before cutting, because the geometry does not always allow a symmetrical return.
Internal corners. Butt them, and leave a gap filled with a flexible sealant rather than adhesive or grout. Two rigid planes meeting in a corner need somewhere to move.
Edges and stops. Decide how the field terminates: a shadow gap, a metal trim, or a returned tile at the reveal. A cut tile ending on a plaster arris chips within a year and looks unresolved from day one.
Switches and services. Set them out with the tiles rather than after them. A socket plate sits at a different depth depending on where it lands on the pattern, so the electrician needs the tile drawing.
Grout, or not
Most of these patterns are laid with a close butt joint so the wall reads as one plane, which is the whole point of a relief tile. Where a joint is needed, keep it minimal and match the grout to the tile body. A contrasting grout line turns a sculpted surface back into a grid of squares.
Keep the faces clean as you work. Cement based residue dries into the texture of a cast face and is hard to remove later without damaging the surface.
Lighting the relief
Relief only exists because of shadow, so lighting is part of the tile decision.
Light the wall from a grazing angle, close to the plane, from above or from one side. A wall washer set out from the wall lights the faces and the recesses equally and flattens the pattern, which is the commonest way a good installation is spoiled.
Put the source on the same side as the strongest daylight, so the artificial shadow does not fight the natural one. Then look at the wall lit before the positions are signed off. A 100mm change in the distance from the wall visibly changes how deep the pattern reads.
Two walls we have laid
Bahria Town Tower, Karachi. Lehr, a hexagonal geometry, across a large vertical field. A pattern like this is entirely a setting out exercise. The hexagon has to hold its line over the full height of the wall, so the datum is set once and every course is checked back to it rather than to the course below.
Optium Technologies, Karachi. Mathlath, a triangulated relief on an office wall. Here the corner and the light decided everything. A faceted pattern reads differently under a daytime scheme and an evening one, and the mock up settled the lighting positions before the tiles were ordered.
Site checklist
- Wall flat, plumb, dry and rated for the weight.
- Full elevation set out at real dimensions, cuts placed deliberately.
- Tiles mixed across boxes.
- Heavy tile adhesive, solid bed, back buttered, bottom course supported.
- Mitred external corners, sealed internal corners, a resolved edge detail.
- Joints minimal, grout matched, faces cleaned as the work proceeds.
- Lighting grazing the surface, confirmed on a mock up before the order.
Hold the material before you specify it
Send the finish codes and the room, and we will come back with samples and a quote.